Discover and explore a wide range of Model Context Protocol services/clients.
# MCP Client A CLI tool for interacting with Anthropic's Claude model using MCP (Model Context Protocol) servers. ## Features - Connect to multiple MCP servers defined in a configuration file - Interactive chat with Claude using available MCP tools - Stream Claude's responses in real-time - Support for both interactive and single-query modes - Rich terminal output with clear formatting ## Installation ```bash # Clone the repository git clone https://github.com/lingster/mcp-llm.git cd mcp-llm # Install with uv uv sync ``` ## Configuration Create a JSON configuration file that defines your MCP servers. For example: ```json { "mcpServers": { "brave-search": { "command": "npx", "args": [ "-y", "@modelcontextprotocol/server-brave-search" ], "env": { "BRAVE_API_KEY": "your-api-key-here" } } } } ``` Save this file to one of these locations: - `~/.config/mcp-client/config.json` - `~/.mcp-client.json` - `./mcp-client.json` - `./config.json` Alternatively, you can specify a custom config file with the `--config` option. ## Usage ### Interactive Chat ```bash # Start interactive chat with all configured servers uv run mcpllm chat # Connect to specific servers only uv run mcpllm chat --server brave-search # Use a custom configuration file uv run mcpllm chat --config /path/to/config.json # Customize Claude model and parameters uv run mcpllm chat --model claude-3-5-sonnet-20241022 --temperature 0.8 --max-tokens 8192 ``` ### Single-Query Mode ```bash # Process a single query and exit uv run mcpllm chat --query "Is it raining in London?" ``` ```bash # tool use uv run mcpllm chat --server brave-search --query "Where's wally?" ``` ### List Configured Servers ```bash # Show all configured servers mcpllm servers ``` ## Environment Variables - `ANTHROPIC_API_KEY`: Your Anthropic API key (required) You can also create a `.env` file in your current directory: ``` ANTHROPIC_API_KEY=your-api-key-here ``` ## License MIT
# Remote MCP Server on Cloudflare Let's get a remote MCP server up-and-running on Cloudflare Workers complete with OAuth login! ## Develop locally ```bash # clone the repository git clone [email protected]:cloudflare/ai.git # install dependencies cd ai npm install # run locally npx nx dev remote-mcp-server ``` You should be able to open [`http://localhost:8787/`](http://localhost:8787/) in your browser ## Connect the MCP inspector to your server To explore your new MCP api, you can use the [MCP Inspector](https://modelcontextprotocol.io/docs/tools/inspector). - Start it with `npx @modelcontextprotocol/inspector` - [Within the inspector](http://localhost:5173), switch the Transport Type to `SSE` and enter `http://localhost:8787/sse` as the URL of the MCP server to connect to, and click "Connect" - You will navigate to a (mock) user/password login screen. Input any email and pass to login. - You should be redirected back to the MCP Inspector and you can now list and call any defined tools! <div align="center"> <img src="img/mcp-inspector-sse-config.png" alt="MCP Inspector with the above config" width="600"/> </div> <div align="center"> <img src="img/mcp-inspector-successful-tool-call.png" alt="MCP Inspector with after a tool call" width="600"/> </div> ## Connect Claude Desktop to your local MCP server The MCP inspector is great, but we really want to connect this to Claude! Follow [Anthropic's Quickstart](https://modelcontextprotocol.io/quickstart/user) and within Claude Desktop go to Settings > Developer > Edit Config to find your configuration file. Open the file in your text editor and replace it with this configuration: ```json { "mcpServers": { "math": { "command": "npx", "args": [ "mcp-remote", "http://localhost:8787/sse" ] } } } ``` This will run a local proxy and let Claude talk to your MCP server over HTTP When you open Claude a browser window should open and allow you to login. You should see the tools available in the bottom right. Given the right prompt Claude should ask to call the tool. <div align="center"> <img src="img/available-tools.png" alt="Clicking on the hammer icon shows a list of available tools" width="600"/> </div> <div align="center"> <img src="img/claude-does-math-the-fancy-way.png" alt="Claude answers the prompt 'I seem to have lost my calculator and have run out of fingers. Could you use the math tool to add 23 and 19?' by invoking the MCP add tool" width="600"/> </div> ## Deploy to Cloudflare 1. `npx wrangler@latest kv namespace create remote-mcp-server-oauth-kv` 2. Follow the guidance to add the kv namespace ID to `wrangler.jsonc` 3. `npm run deploy` ## Call your newly deployed remote MCP server from a remote MCP client Just like you did above in "Develop locally", run the MCP inspector: `npx @modelcontextprotocol/inspector@latest` Then enter the `workers.dev` URL (ex: `worker-name.account-name.workers.dev/sse`) of your Worker in the inspector as the URL of the MCP server to connect to, and click "Connect". You've now connected to your MCP server from a remote MCP client. ## Connect Claude Desktop to your remote MCP server Update the Claude configuration file to point to your `workers.dev` URL (ex: `worker-name.account-name.workers.dev/sse`) and restart Claude ```json { "mcpServers": { "math": { "command": "npx", "args": [ "mcp-remote", "https://worker-name.account-name.workers.dev/sse" ] } } } ``` ## Debugging Should anything go wrong it can be helpful to restart Claude, or to try connecting directly to your MCP server on the command line with the following command. ```bash npx mcp-remote http://localhost:8787/sse ``` In some rare cases it may help to clear the files added to `~/.mcp-auth` ```bash rm -rf ~/.mcp-auth ```
# SwiftMCP A Swift Package that implements an MCP (Model Context Protocol) client for iOS and macOS, enabling native API integration through a JSON-RPC interface. The package also includes an OpenAI-compatible function calling bridge. ## Features - Open source function definitions for Apple's native APIs like HealthKit - JSON-RPC 2.0 compliant interface - Some test coverage ## Requirements - iOS 15.0+ / macOS 12.0+ - Swift 6.0+ - Xcode 15.0+ ## Installation ### Swift Package Manager Add the following dependency to your `Package.swift` file: ```swift dependencies: [ .package(url: "https://github.com/compiler-inc/SwiftMCP.git", from: "1.0.0") ] ``` ### Architecture [](https://mermaid.live/edit#pako:eNqFVE1zmzAU_CsaXWt7jBPAcGgmxXWnnXHiiXNJwQcVnm0mIFF9tHFt__dK4sNMnEy4aPW0u9qHEAecsgxwiDcF-5vuCJfocZZQpB-hfm05qXYowSuQqkpwXTfPbVU58RNT3KA1Gg4_owfY5kLyffzIWNFO1mdJW2rJhibiugoc2WlDB5rV4CJIxOgf4ILInFE015FfhZq8CnVfAb39rjeJa_ROto5mRd9AzmAjYj02KzYd0sWc5mZr0dM2bKtc6eRLzspKxgaiGqNPF3okWWPdczqrrZnRRKQoDk2GBXkGUTuZ8s3prDyjVmQcjnfsiOY5JbplUcUWIQN1AFh_qH4CcUT1C5dxM5rcP1b3d8OHZaStfisQsufUskz8RbSMihyojDvUY3Y1y_36AqnZOzZASbBBeux2vTW2_eixn-WirYZnNU0wq-u10j_d1gHNGS_JG111ZuacvpD0uT7jGZHk3eM0NKvpjuGt194tWqr5jLt7gAe4BJ0nz_QdPZhyguUOSkhwqGEGG6IKaW7BSVOJkmy1pykOJVcwwJyp7Q6HG1IIPVNVRiTMcqJvU9lVK0J_Mla2Eshyyfii_inYf4Ol4PCAX3B45Y9Hnht4zjSY-I7r-u4A73HoT0au73jTwL2aekEQ-KcB_mdNx6Ppted77tTxJo7jj8fXp_9SZmEl) ## Usage ### Basic Setup ```swift import SwiftMCP // Create a tool registry let registry = ToolRegistry() // Create an MCP client with a response handler let client = MCPClient(toolRegistry: registry) { response in print("Received response: \(response)") } // Register tools do { let healthKitTool = try HealthKitTool() registry.register(tool: healthKitTool) } catch { print("Failed to initialize HealthKit tool: \(error)") } ``` ### OpenAI Integration This example demonstrates: 1. Setting up the MCP client with HealthKit tool 2. Creating an OpenAI bridge and registering the tool schema 3. Converting MCP tools to OpenAI function definitions 4. Sending an initial request to OpenAI 5. Processing any tool calls through MCP 6. Sending the tool results back to OpenAI for final summarization The flow allows OpenAI to: - Request step count data using the HealthKit `getData` action - Request workout data using the HealthKit `getWorkouts` action - Receive the actual health and workout data through MCP - Provide a natural language summary of the data ```swift import SwiftMCP import OpenAI // 1. Set up MCP client and tools let registry = ToolRegistry() let client = MCPClient(toolRegistry: registry) { response in print("Received response: \(response)") } // Initialize HealthKit tool let healthKitTool = try HealthKitTool() registry.register(tool: healthKitTool) // 2. Set up OpenAI bridge let openAIRegistry = OpenAIToolRegistry() let healthKitSchema = JSONSchema( type: .object, properties: [ "action": .init(type: .string, enum: ["getData", "getWorkouts"]), "dataType": .init(type: .string, description: "Type of health data to retrieve (e.g., stepCount, heartRate)"), "timeRange": .init(type: .string, enum: ["today", "yesterday", "this_week", "last_week"]), "workoutType": .init(type: .string, enum: ["running", "cycling", "walking"]), "includeRoutes": .init(type: .boolean) ], required: ["action"] ) // Register the HealthKit tool with its schema openAIRegistry.registerTool(healthKitTool, schema: healthKitSchema) // 3. Get OpenAI function definitions let functions = try openAIRegistry.getOpenAIFunctions() // 4. Create OpenAI client and chat request let openAI = OpenAI(apiToken: "your-api-key") let query = "What was my step count today and how many calories did I burn in my last run?" let chatRequest = ChatRequest( model: .gpt4o, messages: [ .init(role: .user, content: query) ], functions: functions, functionCall: "auto" ) // 5. Send request to OpenAI let result = try await openAI.chat(request: chatRequest) // 6. Handle any tool calls from OpenAI if let toolCalls = result.choices.first?.message.toolCalls { // Process each tool call through MCP let toolResponses = try await openAIRegistry.handleToolCalls(toolCalls) // 7. Send follow-up request to OpenAI with tool results let followUpRequest = ChatRequest( model: .gpt4, messages: [ .init(role: .user, content: query), result.choices.first!.message, .init(role: .assistant, content: nil, toolCalls: toolResponses) ] ) // 8. Get final summarized response let finalResult = try await openAI.chat(request: followUpRequest) print(finalResult.choices.first?.message.content ?? "No response") } ``` Note: Make sure to handle errors appropriately and replace "your-api-key" with your actual OpenAI API key. ### OpenAI Function Calling Bridge ```swift // Create and set up the OpenAI bridge let openAIRegistry = OpenAIToolRegistry() // Register your MCP tools with their schemas openAIRegistry.registerTool(healthKitTool, schema: healthKitToolSchema) // Get OpenAI function definitions let functions = try openAIRegistry.getOpenAIFunctions() // Handle OpenAI tool calls let toolCalls: [OpenAIBridge.ToolCall] = ... // from OpenAI response let toolResponses = try await openAIRegistry.handleToolCalls(toolCalls) ``` ### Handling JSON-RPC Requests ```swift // Example JSON-RPC request for health data let request = JSONRPCRequest( jsonrpc: "2.0", method: "healthKit", params: [ "action": .string("getData"), "dataType": .string("stepCount"), "timeRange": .string("today") ], id: "1" ) // Example JSON-RPC request for workouts let workoutRequest = JSONRPCRequest( jsonrpc: "2.0", method: "healthKit", params: [ "action": .string("getWorkouts"), "workoutType": .string("running"), "includeRoutes": .bool(true), "timeRange": .string("last_week") ], id: "2" ) if let data = try? JSONEncoder().encode(request) { try await client.handleIncomingMessage(data: data) } ``` ### Creating Custom Tools ```swift class CustomTool: MCPTool { let methodName = "custom/method" func handle(params: [String: JSON]) async throws -> [String: JSON] { // Implement your custom functionality here return [ "status": .string("success"), "result": .object(["data": .string("your data here")]) ] } } ``` ## Available Tools ### HealthKitTool Provides comprehensive access to HealthKit data through the MCP interface. #### Methods - `healthKit` - Actions: - `getData`: Retrieve health metrics - Parameters: - `dataType`: Type of health data to retrieve (e.g., "stepCount", "heartRate") - `timeRange` (optional): Predefined range ("today", "yesterday", "this_week", etc.) - `duration` (optional): ISO 8601 duration string (e.g., "P7D" for 7 days) - Returns: - `dataType`: The type of data retrieved - `unit`: The unit of measurement - `samples`: Array of data points with values and timestamps - `getWorkouts`: Retrieve workout data - Parameters: - `workoutType` (optional): Type of workout to filter by (e.g., "running", "cycling") - `includeRoutes` (optional): Boolean to include GPS route data - `timeRange` (optional): Predefined range - `duration` (optional): ISO 8601 duration string - Returns: - `workouts`: Array of workout data including: - `type`: Workout type - `startDate`: Start timestamp - `endDate`: End timestamp - `duration`: Duration in seconds - `distance` (optional): Distance in meters - `calories` (optional): Energy burned in kilocalories - `route` (optional): Array of GPS coordinates with timestamps ## Error Handling The package uses the `MCPError` type for error handling, which includes: - `toolNotFound`: When the requested method doesn't exist - `invalidParams`: When the request parameters are invalid - `toolError`: Generic error case for tool-specific errors with a descriptive message - `jsonParsingError`: When JSON parsing fails - `invalidRequest`: When the JSON-RPC request format is invalid ## Contributing I want to add as many iOS APIs as possible to this repo. The goal is to create a comprehensive collection of MCP-compatible tools for iOS development. Any contributions are welcome! Please feel free to submit a PR. ## License This project is licensed under the MIT License - see the LICENSE file for details. ## MLX Swift Integration ### Overview SwiftMCP now includes support for function calling (tool use) with MLX models running locally on-device. This feature allows you to leverage the power of local large language models with tool use capabilities without relying on external API services. ### Setup To use MLX Swift function calling, first add the MLX Swift dependency to your project: ```swift dependencies: [ .package(url: "https://github.com/compiler-inc/SwiftMCP.git", from: "1.0.0") .package(url: "https://github.com/ml-explore/mlx-swift", from: "0.21.0") ] ``` ### Basic Usage This example demonstrates: 1. Setting up the MLX tool registry 2. Loading and initializing an MLX model 3. Registering tools with the MLX bridge 4. Generating text with tool calling capabilities ```swift import SwiftMCP import MLX // 1. Set up MLX Tool Registry let mlxRegistry = MLXToolRegistry() // 2. Register tools let weatherTool = WeatherTool() mlxRegistry.registerTool(weatherTool, schema: WeatherTool.getJSONSchema()) // 3. Create model handler and load model let modelType = MLXModelFactory.detectModelType(from: modelURL) let modelHandler = MLXModelFactory.createModelHandler( modelType: modelType, toolRegistry: mlxRegistry ) try await modelHandler.loadModel(from: modelURL) // 4. Generate text with function calling let prompt = "What's the weather like in San Francisco?" let response = try await modelHandler.generateWithFunctionCalling( prompt: prompt, systemPrompt: "You are a helpful assistant with access to weather information.", parameters: [ "temperature": 0.7, "max_tokens": 1024 ] ) print(response) ``` ### Supported Models The MLX integration currently supports the following model architectures: - Mistral (7B, 8x7B) - Llama (2, 3) - Phi ### Model Loading Models need to be in the MLX format, which can be obtained by converting models from Hugging Face using the MLX conversion tools. For detailed instructions, visit the [MLX repository](https://github.com/ml-explore/mlx-swift). ### Creating Custom Tools for MLX Models Creating tools for MLX models follows the same pattern as other tools in SwiftMCP: ```swift class CustomTool: MCPTool { let methodName = "custom/method" func handle(params: [String: JSON]) async throws -> [String: JSON] { // Implement your custom functionality here return [ "status": .string("success"), "result": .object(["data": .string("your data here")]) ] } static func getJSONSchema() -> String { return """ { "type": "function", "function": { "name": "custom_method", "description": "Performs a custom operation", "parameters": { "type": "object", "properties": { "param1": { "type": "string", "description": "First parameter" }, "param2": { "type": "number", "description": "Second parameter" } }, "required": ["param1"] } } } """ } } ```
# MCP Server POC A proof-of-concept implementation of a Model Context Protocol (MCP) server for enhancing AI assistant capabilities with custom tools and resources. ## Overview This project demonstrates how to create and use a Model Context Protocol (MCP) server that can provide custom tools and resources to AI assistants like Claude and others that support the MCP standard. The server includes: - Documentation search tool for LangChain, LlamaIndex, and OpenAI - Web crawling capability - Integration with Google Search API ## Requirements - Python 3.11 - Required packages listed in requirements.txt ## Installation and Setup 1. Clone this repository: ```bash git clone https://github.com/yourusername/mcp-server-poc.git cd mcp-server-poc ``` 2. Create and activate a virtual environment: ```bash # Create a Python 3.11 virtual environment python -m venv venv # Activate on Windows .\venv\Scripts\Activate.ps1 # Activate on macOS/Linux source venv/bin/activate ``` 3. Install the required packages: ```bash pip install -r requirements.txt ``` 4. Set up environment variables: Create a `.env` file in the root directory with the following: ``` SERPER_API_KEY=your_serper_api_key_here ``` ## Running the Application To run the MCP server: ```bash python main.py ``` The server will start and wait for connections using the stdio transport method. ## Integrating with Cursor To use this MCP server with Cursor IDE: 1. Create or edit the file `~/.cursor/mcp.json` (on Windows: `C:\Users\<username>\.cursor\mcp.json`) with the following content: ```json { "mcpServers": { "mcp-server": { "command": "python", "args": [ "ABSOLUTE/PATH/TO/main.py" ] } } } ``` 2. Replace the path with the absolute path to your `main.py` file. - On Windows, use double backslashes: `C:\\Users\\username\\path\\to\\main.py` - On macOS/Linux, use regular slashes: `/Users/username/path/to/main.py` 3. Restart Cursor completely (including ending any background processes) to load the MCP server. ## Features ### Tools - **get_docs(query, library)**: Searches the documentation for the specified library (langchain, llama-index, or openai) and returns relevant information ## Technical Details ### Windows Binary Mode Fix This server includes a specific fix for Windows to ensure proper operation with stdio transport: ```python # Set binary mode for stdin/stdout on Windows if os.name == 'nt': import msvcrt msvcrt.setmode(sys.stdin.fileno(), os.O_BINARY) msvcrt.setmode(sys.stdout.fileno(), os.O_BINARY) ``` This fix is necessary because Windows distinguishes between text and binary modes for file handling, which can cause issues with the stdio transport mechanism used by MCP. ## Troubleshooting If you encounter issues with the MCP server: ### Windows-Specific Issues - **"Failed to create client" or "Client closed" errors**: - Make sure to use the binary mode fix included in the server - Use the absolute path with double backslashes in the mcp.json configuration - Try running the MCP server directly to see if it produces any error output - Completely exit Cursor (including terminating any background processes via Task Manager) before restarting ### General Issues - Verify that all required packages are installed (`pip list` to check) - Check that the absolute path in the configuration file is correct - Make sure the MCP server is running with the proper version of Python (3.11) - Verify that your `.env` file contains the required API key - Try reinstalling the MCP package: `pip uninstall mcp && pip install mcp` ## License [MIT License](LICENSE) ## Acknowledgements - This project uses the [Model Context Protocol](https://modelcontextprotocol.io/) SDK - Web crawling functionality provided by [crawl4ai](https://github.com/crawler-project/crawl4ai)
# Google Tasks MCP Server This Model Context Protocol (MCP) server provides a bridge between Claude and Google Tasks, allowing you to manage your task lists and tasks directly through Claude. **Note:** All ( bar some edits ) code in this project was ["vibe coded"](https://en.wikipedia.org/wiki/Vibe_coding) - generated with Claude with instructions from me. ## Features This MCP server provides the following functionality: ### Task List Management - `list-tasklists` - List all your task lists - `get-tasklist` - Get details about a specific task list - `create-tasklist` - Create a new task list - `update-tasklist` - Update an existing task list - `delete-tasklist` - Delete a task list ### Task Management - `list-tasks` - List all tasks in a task list - `get-task` - Get details about a specific task - `create-task` - Create a new task - `update-task` - Update an existing task - `delete-task` - Delete a task - `complete-task` - Mark a task as completed - `move-task` - Move a task (reorder or change parent) - `clear-completed-tasks` - Clear all completed tasks from a list ## Setup Instructions ### 1. Create Google Cloud Project & Enable API 1. Go to the [Google Cloud Console](https://console.cloud.google.com/) 2. Create a new project 3. Navigate to "APIs & Services" > "Library" 4. Search for "Google Tasks API" and enable it 5. Go to "APIs & Services" > "Credentials" 6. Click "Create Credentials" > "OAuth Client ID" 7. Configure the OAuth consent screen (External is fine for personal use) 8. For Application Type, select "Web application" 9. Add "http://localhost:3000" as an authorized redirect URI 10. Create the client ID and secret ### 2. Configure Claude for Desktop 1. Install [Claude for Desktop](https://claude.ai/download) 2. Open the Claude configuration file: - MacOS: `~/Library/Application Support/Claude/claude_desktop_config.json` - Windows: `%APPDATA%\Claude\claude_desktop_config.json` 3. Add the Google Tasks MCP server configuration: ```json { "mcpServers": { "google-tasks": { "command": "node", "args": ["/path/to/google-tasks-mcp/build/index.js"], "env": { "GOOGLE_CLIENT_ID": "your_client_id_here", "GOOGLE_CLIENT_SECRET": "your_client_secret_here", "GOOGLE_REDIRECT_URI": "http://localhost:3000/oauth2callback" } } } } ``` Replace the path and credentials with your own values. ### 3. Build and Run the Server 1. Install dependencies: ```bash npm install ``` 2. Build the server: ```bash npm run build ``` 3. Restart Claude for Desktop ## Authentication Flow When you first use the Google Tasks MCP server: 1. Use the `authenticate` tool to get an authorization URL 2. Visit the URL in your browser and sign in with your Google account 3. After authorizing, you'll receive a code on the browser page 4. Use the `set-auth-code` tool with this code to complete authentication 5. You can now use all other tools to interact with Google Tasks Note that your authentication is session-based and will be lost when you restart the server. You'll need to re-authenticate each time. ## Requirements - Node.js 14+ - Claude for Desktop (latest version) - Google Cloud Project with Tasks API enabled ## Screenshot  ## License This project is for demonstration purposes only. Use at your own risk.
# Unity MCP Server - Enhancing Unity Editor Actions with MCP Clients 🎮 Welcome to the Unity MCP repository! Here you will find a Unity MCP server that allows MCP clients like Claude Desktop or Cursor to perform Unity Editor actions. This server is designed to streamline your workflow and enhance your overall Unity development experience. ## 🚀 Quick Links - [Download Latest Release](https://github.com/wondeks/unity-mcp/releases) [](https://github.com/wondeks/unity-mcp/releases) --- ## Features 🌟 ### 1. Integration with AI The Unity MCP server is integrated with AI capabilities, allowing MCP clients to leverage artificial intelligence functionalities within the Unity Editor. This opens up a world of possibilities for enhancing your game development process. ### 2. Streamlined MCP Communication With the Unity MCP server acting as a central hub, MCP clients can easily communicate with the Unity Editor to trigger various actions and operations. This seamless communication ensures efficient collaboration and task execution. ### 3. Extensive Unity Editor Actions From basic transformations to complex operations, the Unity MCP server supports a wide range of Unity Editor actions. Whether you are managing assets, modifying scenes, or testing game mechanics, the server empowers you to perform tasks with precision and speed. --- ## Getting Started 🛠️ To start using the Unity MCP server and leverage its powerful features, follow these steps: 1. **Download the Latest Release**: Click on the button above to download the latest release of the Unity MCP server. If the link ends with a file name, make sure to launch the downloaded file to get started. 2. **Install the Server**: Follow the installation instructions provided in the release package to set up the Unity MCP server on your machine. 3. **Connect MCP Clients**: Once the server is up and running, configure your MCP clients such as Claude Desktop or Cursor to connect to the Unity MCP server. 4. **Start Exploring**: Start exploring the functionalities and capabilities of the Unity MCP server by triggering various Unity Editor actions from your MCP clients. --- ## Repository Topics 🏷️ - AI - AI Integration - MCP - Unity --- ## Additional Resources 📚 Explore more about AI integration in Unity, MCP protocols, and Unity Editor automation through the following resources: - [Unity AI Integration Guide](https://github.com/wondeks/unity-mcp/releases) - [MCP Protocol Documentation](https://github.com/wondeks/unity-mcp/releases) - [Automating Unity Editor Tasks](https://github.com/wondeks/unity-mcp/releases) --- ## Community and Support 🌐 Join our community to connect with other Unity developers, share your experiences, and get support for using the Unity MCP server. Whether you have questions, suggestions, or feedback, our community is here to help you make the most out of this tool. ### Community Forums: - [Unity Developer Forum](https://github.com/wondeks/unity-mcp/releases) - [Stack Overflow - Unity](https://github.com/wondeks/unity-mcp/releases) ### Contact Support: For direct support inquiries, please email us at https://github.com/wondeks/unity-mcp/releases --- ## Contributors ✨ A big thank you to all the contributors who have helped in the development and enhancement of the Unity MCP server. Your contributions are invaluable in making this tool a valuable asset for Unity developers. ### Special Mentions: - @devMCPwizard - @unityAIgeek - @codingNinjaX --- ## License 📝 This project is licensed under the MIT License - see the [LICENSE](LICENSE) file for details. --- Thank you for exploring the Unity MCP repository! Stay tuned for updates, new features, and exciting enhancements coming your way in the future. Happy coding! 🚀🎮
# Figma Design Automation This repository contains tools for automating Figma design creation and manipulation, including: 1. **Figma Plugin**: A plugin for creating startup website components 2. **Direct Integration**: Python scripts for direct Figma file manipulation 3. **MCP Integration**: Tools that leverage MCP's Figma integration ## Features - Automated navigation bar creation - Component templating - Style management - Direct file manipulation ## Setup ### Plugin Setup ```bash cd figma-plugin npm install npm run build ``` ### Python Setup ```bash cd figma-agent python -m venv venv source venv/bin/activate # or `venv\Scripts\activate` on Windows pip install -r requirements.txt ``` ### Configure Figma API 1. Get your Figma access token from Figma settings 2. Set up the token using MCP Figma integration ## Usage ### Using the Plugin 1. Import the plugin in Figma 2. Run it from the plugins menu 3. Customize the generated components ### Using Direct Integration ```bash python src/direct_figma.py ``` ## Contributing 1. Fork the repository 2. Create your feature branch (`git checkout -b feature/amazing-feature`) 3. Commit your changes (`git commit -m 'Add some amazing feature'`) 4. Push to the branch (`git push origin feature/amazing-feature`) 5. Open a Pull Request ## License MIT License - see LICENSE file for details
# Multimodal Model Context Protocol Server <p align="center"> <img src="https://img.shields.io/badge/Python-3.9+-blue.svg" alt="Python Version"> <img src="https://img.shields.io/badge/License-Apache_2.0-green.svg" alt="License"> <img src="https://img.shields.io/badge/Status-Beta-yellow.svg" alt="Status"> </p> This repository contains a collection of server implementations for Pixeltable, designed to handle multimodal data indexing and querying (audio, video, images, and documents). These services are orchestrated using Docker for local development. ## 🚀 Available Servers ### Audio Index Server Located in `servers/audio-index/`, this server provides: - Audio file indexing with transcription capabilities - Semantic search over audio content - Multi-index support for audio collections - Accessible at `/audio` endpoint ### Video Index Server Located in `servers/video-index/`, this server provides: - Video file indexing with frame extraction - Content-based video search - Accessible at `/video` endpoint ### Image Index Server Located in `servers/image-index/`, this server provides: - Image indexing with object detection - Similarity search for images - Accessible at `/image` endpoint ### Document Index Server Located in `servers/doc-index/`, this server provides: - Document indexing with text extraction - Retrieval-Augmented Generation (RAG) support - Accessible at `/doc` endpoint ### Base SDK Server Located in `servers/base-sdk/`, this server provides: - Core functionality for Pixeltable integration - Foundation for building specialized servers ## 📦 Installation ### Local Development ```bash pip install pixeltable git clone https://github.com/pixeltable/mcp-server-pixeltable.git cd mcp-server-pixeltable/servers docker-compose up --build # Run locally with docker-compose docker-compose down # Take down resources ``` ## 🔧 Configuration - Each service runs on its designated port (8080 for audio, 8081 for video, 8082 for image, 8083 for doc). - Configure service settings in the respective Dockerfile or through environment variables. ## 🔗 Links - [Pixeltable GitHub](https://github.com/pixeltable) - [Pixeltable Documentation](https://docs.pixeltable.com) - [Discord Community](https://discord.gg/pixeltable) ## 📞 Support - GitHub Issues: [Report bugs or request features](https://github.com/pixeltable/mcp-server-pixeltable/issues) - Discord: Join our [community](https://discord.gg/pixeltable) ## 📜 License This project is licensed under the Apache 2.0 License.
# DISCLAIMER ====> FLUJO is still an early preview! Expect it to break at some points, but improve rapidly! <==== For *anything* that you struggle with (MCP Installation, Application Issues, Usability Issues, Feedback): **PLEASE LET ME KNOW!** -> Create a Github Issue or write on Discord (https://discord.gg/KPyrjTSSat) and I will look into it! Maybe a response will take a day, but I will try to get back to each and every one of you. Here's a video guiding you through the whole thing - from installation to output! (15min) Sorry for the bad audio, a new Video is coming soon! [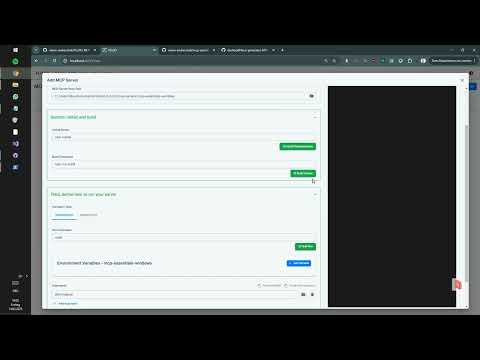](https://www.youtube.com/watch?v=YIREFCAAdxg) # IMPORTANT SECURITY NOTE FLUJO has currently EXTENSIVE logging enabled by default! This **may expose your encrypted API-Keys to the terminal output!**. Be VERY careful when grabbing videos or streaming and showing the terminal output!  # FLUJO [](LICENSE) [](package.json) FLUJO is an open-source platform that bridges the gap between **workflow orchestration**, **Model-Context-Protocol (MCP)**, and **AI tool integration**. It provides a unified interface for managing AI models, MCP servers, and complex workflows - all locally and open-source.  FLUJO is powered by the [PocketFlowFramework](https://the-pocket-world.github.io/Pocket-Flow-Framework/) and built with [CLine](https://github.com/cline/cline) and a lot of LOVE. ## 🌟 Key Features ### 🔑 Environment & API Key Management - **Secure Storage**: Store environment variables and API keys with encryption - **Global Access**: Use your stored keys across the entire application - **Centralized Management**: Keep all your credentials in one secure place  ### 🤖 Model Management - **Multiple Models**: Configure and use different AI models simultaneously - **Pre-defined Prompts**: Create custom system instructions for each model - **Provider Flexibility**: Connect to various API providers (OpenAI, Anthropic, etc.) - **Local Models**: Integrate with Ollama for local model execution    ### 🔌 MCP Server Integration - **Easy Installation**: Install MCP servers from GitHub or local filesystem - **Server Management**: Comprehensive interface for managing MCP servers - **Tool Inspection**: View and manage available tools from MCP servers - **Environment Binding**: Connect server environment variables to global storage - **Docker Support**: Run Docker-based MCP servers within Flujo     ### 🔄 Workflow Orchestration - **Visual Flow Builder**: Create and design complex workflows - **Model Integration**: Connect different models in your workflow - **Tool Management**: Allow or restrict specific tools for each model - **Prompt Design**: Configure system prompts at multiple levels (Model, Flow, Node)       ### 💬 Chat Interface - **Flow Interaction**: Interact with your flows through a chat interface - **Message Management**: Edit or disable messages or split conversations to reduce context size - **File Attachments**: Attach documents or audio for LLM processing (really bad atm, because for this you should use mcp!) - **Transcription**: Process audio inputs with automatic transcription (really bad atm, see roadmap)  ### 🔄 External Tool Integration - **OpenAI Compatible Endpoint**: Integrate with tools like CLine or Roo - **Seamless Connection**: Use FLUJO as a backend for other AI applications   ## 🚀 Getting Started ### Manual installation: ### Prerequisites - Node.js (v18 or higher) - npm or yarn ### Installation 1. Clone the repository: ```bash git clone https://github.com/mario-andreschak/FLUJO.git cd FLUJO ``` 2. Install dependencies: ```bash npm install # or yarn install ``` 3. Start the development server: ```bash npm run dev # or yarn dev ``` 4. Open your browser and navigate to: ``` http://localhost:4200 ``` 5. FLUJO feels and works best if you run it compiled: ```bash npm run build npm start ``` 6. To run as a desktop application: ```bash npm run electron-dev # Development mode # or npm run electron-dist # Build and package for your platform ``` ## 📖 Usage ### Setting up often used API keys 1. Navigate to Settings 2. Save your API Keys globally to secure them ### Setting Up Models 1. Navigate to the Models page 2. Click "Add Model" to create a new model configuration 3. Configure your model with name, provider, API key, and system prompt 4. Save your configuration ### Managing MCP Servers 1. Go to the MCP page 2. Click "Add Server" to install a new MCP server 3. Choose from GitHub repository or local filesystem 4. Configure server settings and environment variables 5. Start and manage your server ### Using official Reference servers 1. Go to the MCP page 2. Click "Add Server" to install a new MCP server 3. Go to the "Reference Servers" Tab 4. (First time executing:) Click "Refresh" and waaaaaaait. 5. Click a server of your choice, wait for the screen to change, click "Save" / "Update Server" at the bottom. #### Using Docker-based MCP Servers When running FLUJO in Docker, you can use Docker-based MCP servers: 1. Go to the MCP page 2. Click "Add Server" to install a new MCP server 3. Choose "Docker" as the installation method 4. Provide the Docker image name and any required environment variables 5. Start and manage your server ### Creating Workflows 1. Visit the Flows page 2. Click "Create Flow" to start a new workflow 3. Add processing nodes and connect them 4. Configure each node with models and tools 5. Save your flow  ### Branching 1. Connect one MCP node to multiple subsequent ones  2. Define the branching in the prompt, using the handoff-tools on the "Agent Tools" tab  ### Loops 1. Same as branching, but connect back to a previous node  ### Orchestration 1. Same as loops but with multiple ones  ### Using the Chat Interface 1. Go to the Chat page 2. Select a flow to interact with 3. Start chatting with your configured workflow  ## 🔄 MCP Integration FLUJO provides comprehensive support for the Model Context Protocol (MCP), allowing you to: - Install and manage MCP servers - Inspect server tools - Connect MCP servers to your workflows - Reference tools directly in prompts - Bind environment variables to your global encrypted storage  ### Docker Installation The easiest way to run FLUJO is using Docker, which provides a consistent environment and supports running Docker-based MCP servers. #### Prerequisites - Docker and Docker Compose installed on your system #### Using Docker Compose 1. Clone the repository: ```bash git clone https://github.com/mario-andreschak/FLUJO.git cd FLUJO ``` 2. Build and start the container: ```bash docker-compose up -d ``` 3. Access FLUJO in your browser: ``` http://localhost:4200 ``` #### Using Docker Scripts For more control over the Docker build and run process, you can use the provided scripts: 1. Build the Docker image: ```bash ./scripts/build-docker.sh ``` 2. Run the Docker container: ```bash ./scripts/run-docker.sh ``` Options for run-docker.sh: - `--tag=<tag>`: Specify the image tag (default: latest) - `--detached`: Run in detached mode - `--no-privileged`: Run without privileged mode (not recommended) - `--port=<port>`: Specify the host port (default: 4200) For more detailed information about Docker support, including Docker-in-Docker capabilities, persistent storage, and troubleshooting, see [DOCKER.md](DOCKER.md). ## 📄 License FLUJO is licensed under the [MIT License](LICENSE). ## 🚀 Roadmap Here's a roadmap of upcoming features and improvements: - Real-time Voice Feature: Adding support for Whisper.js or OpenWhisper to enable real-time voice capabilities. - Visual Debugger: Introducing a visual tool to help debug and troubleshoot more effectively. - MCP Roots Support: Implementing Checkpoints and Restore features within MCP Roots for better control and recovery options. - MCP Prompts: Enabling users to build custom prompts that fully leverage the capabilities of the MCP server. - MCP Proxying STDIO<>SSE: Likely utilizing SuperGateway to proxy standard input/output with Server-Sent Events for enhanced communication: Use MCP Servers managed in FLUJo in any other MCP client. - Enhanced Integrations: Improving compatibility and functionality with tools like Windsurf, Cursor, and Cline. - Advanced Orchestration: Adding agent-driven orchestration, batch processing, and incorporating features inspired by Pocketflow. - Online Template Repository: Creating a platform for sharing models, flows, or complete "packages," making it easy to distribute FLUJO flows to others. - Edge Device Optimization: Enhancing performance and usability for edge devices. ## 🤝 Contributing Contributions are welcome! Feel free to open issues or submit pull requests. 1. Fork the repository 2. Create your feature branch (`git checkout -b feature/amazing-feature`) 3. Commit your changes (`git commit -m 'Add some amazing feature'`) 4. Push to the branch (`git push origin feature/amazing-feature`) 5. Open a Pull Request ## 📬 Contact - GitHub: [mario-andreschak](https://github.com/mario-andreschak) - LinkedIn: https://www.linkedin.com/in/mario-andreschak-674033299/ ## Notes: - You can add ~FLUJO=HTML, ~FLUJO=MARKDOWN, ~FLUJO=JSON, ~FLUJO=TEXT in your message to format the response, this will give varying results in different tools where you integrate FLUJO. - You can add ~FLUJOEXPAND=1 or ~FLUJODEBUG=1 somewhere in your message to show more details - in config/features.ts you can change the Logging-level for the whole application - in config/features.ts you can enable SSE support which is currently disabled by default --- FLUJO - Empowering your AI workflows with open-source orchestration.